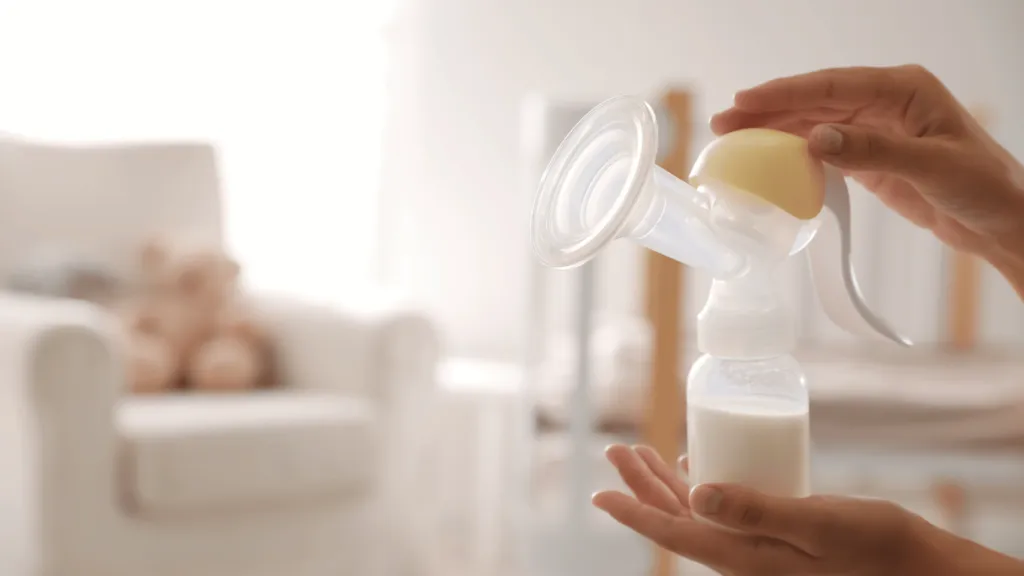
How to Clean and Sterilize a Breast Pump Safely (Step-by-Step Guide to Prevent Mold & Bacteria)
Everything nursing moms need to know about keeping pump parts germ-free — from everyday cleaning to deep sterilization — backed by CDC guidelines and real testing experience.

If you’ve ever stared at your breast pump parts after a session and wondered how thorough do I actually need to be right now? — you’re not alone. As a professional nurse, a mother of two, and someone who has personally tested more than 40 different breast pumps over the years, this is one of the questions I get asked the most.
The truth is, breast pump hygiene isn’t just a household chore. It’s a genuine baby safety issue. In 2016, a premature infant developed life-threatening sepsis from Cronobacter sakazakii — a bacteria traced directly to contaminated pump parts. That case is exactly why the CDC published its first formal breast pump cleaning guidelines, and it’s why I take this topic very seriously on this site.
In this guide, I’m going to walk you through everything — from the basic daily cleaning routine to how to properly sterilize breast pump parts, what to do if you find mold in the tubing, and whether you actually need a dedicated steriliser for a breast pump. I’ve written this to be practical, not overwhelming.
- Why Cleaning Your Breast Pump Is a Baby Safety Issue
- Do You Need to Sterilize a Breast Pump After Each Use?
- What You’ll Need Before You Start
- Step-by-Step: How to Clean Breast Pump Parts (After Every Use)
- How to Sterilize a Breast Pump (4 Proven Methods)
- Can You Sterilize Breast Pump Parts in a Bottle Sterilizer?
- How to Prevent Mold & Bacteria in Your Breast Pump
- What to Do About Breast Pump Tubing
- 8 Common Breast Pump Cleaning Mistakes to Avoid
- Frequently Asked Questions
Why Cleaning Your Breast Pump Is a Genuine Baby Safety Issue
Breast milk is extraordinary nourishment — but it’s also a warm, nutrient-rich medium that bacteria love to grow in. Once milk residue is left on pump parts, even for a few hours at room temperature, bacterial colonies can multiply rapidly. For a newborn whose immune system isn’t fully developed yet, exposure to even small amounts of harmful bacteria can lead to serious infection.
In 2016, a baby born at 29 weeks developed severe sepsis from Cronobacter sakazakii linked to contaminated breast pump valves. The mother had soaked the pump parts in soapy water but did not properly scrub them. This tragedy directly led the CDC to publish its first-ever breast pump hygiene guidelines. A similar case was reported in 2022.
The CDC’s guidelines make it clear: germs can grow quickly in breast milk or breast milk residue that remains on pump parts. Infants — especially those born preterm or under 3 months old — are at significantly higher risk from this kind of contamination. This is why both cleaning and sterilizing matter.
Do You Need to Sterilize a Breast Pump After Each Use?
Do you need to sterilize a breast pump after each use?
No — you don’t need to fully sterilize after every single pumping session. However, you do need to thoroughly clean (wash with hot, soapy water) all milk-contact parts after every use. Full sterilization (sanitizing) should be done at least once per day — or more frequently if your baby is premature, under 3 months old, or immunocompromised.
This is one of the most common points of confusion I hear from new moms, so let’s be precise about the difference between cleaning and sterilizing:
| Term | What It Means | How Often | Priority |
|---|---|---|---|
| Cleaning (Washing) | Removing milk residue with hot soapy water in a dedicated basin | After every single pumping session | Non-Negotiable |
| Sterilizing (Sanitizing) | Killing remaining bacteria through heat (boiling, steam, or dishwasher) | At least once per day | Daily Minimum |
| Sterilizing — High-Risk Babies | Full sterilization for preemies, under 3 months, or sick babies | Multiple times per day / after each session | Critical Priority |
| Tubing Cleaning | Tubing doesn’t touch milk — only clean if moisture or mold appears | As needed / replace if moldy | As Needed |
When I explain this to new moms in the hospital, I use a simple rule: clean after every session, sterilize once a day. If your baby was born early or has any health conditions, treat every cleaning as a sterilizing opportunity. It takes about 5 extra minutes and it’s absolutely worth it.
What You’ll Need Before You Start
Before walking through the actual steps, gather these supplies. Having everything ready in one place makes the process much faster — especially when you’re exhausted at 3am.
- A dedicated clean wash basin used only for breast pump and baby feeding items (never use your regular kitchen sink)
- A small bottle brush specifically designed for breast pump parts (check your pump manual before scrubbing — some parts shouldn’t be brushed)
- A mild, unscented dish soap (fragrance-free is best for baby items)
- Clean paper towels for air-drying (cloth towels can harbor bacteria)
- A clean, sealable bag or covered container for storing reassembled pump parts
- Optional: Microwave steam bags or an electric sterilizer for daily sanitizing
- Optional: A mesh dishwasher basket if your parts are dishwasher-safe
The CDC specifically recommends washing pump parts in a dedicated basin — not directly in the sink. Why? The drain and sink surface can harbor bacteria like Salmonella, E. coli, and yes — Cronobacter sakazakii. A clean basin eliminates that risk entirely. Dedicate one basin exclusively to breast pump and baby bottle cleaning.
Step-by-Step: How to Clean Breast Pump Parts After Every Use
This is your core routine — the one you’ll do after every single pumping session. It typically takes 8–12 minutes once you get the hang of it. Done correctly and consistently, this step alone dramatically reduces the risk of bacterial contamination in your expressed milk.
Wash Your Hands First
Wash hands thoroughly with soap and water for at least 20 seconds before touching any pump parts. This is the first line of defense and non-negotiable. Dry with a clean paper towel.
Store Your Milk Immediately
Cap your milk collection bottle or seal the storage bag, label it with date and time, and refrigerate or freeze right away. Don’t leave expressed milk sitting out while you clean.
Disassemble All Milk-Contact Parts
Take apart every component that came into contact with your breast or milk — flanges/breast shields, valves, membranes, bottles, lids, and connectors. Lay them on a clean surface. Do not disassemble the tubing unless you see moisture or mold inside it.
Rinse Each Part Under Running Water
Rinse each disassembled part under cool or warm running water to remove any visible milk residue. This step makes the washing step more effective. Do this before placing anything in your wash basin.
Wash in Your Dedicated Basin (Not the Sink!)
Fill your clean basin with hot water and a small amount of unscented dish soap. Place all pump parts in the basin. Scrub each piece individually according to your pump manufacturer’s guidance — use a bottle brush only if your manual says it’s safe to do so. Some silicone valves can be damaged by aggressive scrubbing.
Rinse Again Thoroughly
Rinse each part again under running water or in a second basin of clean water to remove all soap residue. Soap left on parts can be transferred to your milk.
Air-Dry Completely — Never Pat Dry
Place all parts on clean paper towels to air-dry fully. Do not use a cloth dish towel to pat them dry — cloth towels can transfer bacteria. Allow complete air-drying before reassembling or storing. Wet parts stored together become a mold incubator.
Store in a Clean, Sealed Container
Once fully dry, reassemble the pump and store in a clean, sealable zip-top bag or a lidded container. This protects the parts from environmental contamination until your next use.
Many experienced pumping moms (including myself!) keep two complete sets of pump parts. After one session, rinse the used set, then use the clean set for the next session. At the end of the day, wash both sets together and sterilize. This dramatically reduces mid-day stress — especially when pumping at work. Check if your insurance covers a second set of replacement parts via our free breast pump through insurance guide.
How to Sterilize a Breast Pump: 4 Proven Methods
Sterilizing (sometimes called sanitizing) goes one step beyond regular washing by using heat to kill bacteria and microorganisms that hot soapy water alone might miss. Here are the four CDC-recognized methods for how to sterilize breast pump parts:
Method 1: Boiling (Most Accessible)
This is the most universally available method — you just need a pot and a stove.
Clean parts first
Always wash parts thoroughly before boiling. Boiling does not remove milk residue — it kills bacteria. Skipping the wash step first is a common mistake.
Place disassembled parts in a pot of water
Fully submerge all disassembled, boil-safe parts in a large pot filled with water. Stir gently to prevent parts from sticking to the bottom hot spot.
Boil for 5–10 minutes
CDC recommends 5 minutes; La Leche League recommends 10. I personally advise 5 minutes for standard boil-safe parts. Over-boiling can degrade soft silicone components faster. Always check your pump’s manual for the manufacturer’s recommended boil time.
Remove with tongs — air-dry on paper towels
Use clean tongs to remove parts and place on fresh paper towels in your clean basin. Allow to fully air-dry before reassembling. Never store while still warm and damp.
Method 2: Microwave Steam Bag (Fastest)
Microwave steam sterilizer bags are incredibly convenient — they kill 99.9% of bacteria in about 3 minutes. You can use them multiple times before replacing (usually 20+ uses per bag). Place washed pump parts in the bag with a small amount of water, microwave per the bag’s instructions, and let cool before opening.
Not all breast pump parts are microwave-safe. Always check your pump’s instruction manual before using a microwave steam bag. Some hard plastic components or parts with metal components should never go in the microwave.
Method 3: Electric Steam Sterilizer (Best for Daily Use)
A plug-in electric steam sterilizer for a breast pump is excellent for daily sterilization and works especially well if you’re an exclusive pumper. Place washed parts inside, add water, and the sterilizer does the rest. It keeps items sterile for up to 24 hours if the lid stays closed. This is my top recommendation for moms who pump frequently throughout the day.
Method 4: Dishwasher (Convenient, With Conditions)
If your breast pump parts are labeled as dishwasher-safe (always check your manual), a hot water cycle with a heated dry setting is an effective sterilizing option. Place small parts like valves and membranes inside a closed-top mesh basket to prevent them from falling to the bottom filter. Run on the hottest water setting available. Air-dry any parts that aren’t fully dry when the cycle completes.
| Sterilization Method | Time Required | Equipment Needed | Best For | Rating |
|---|---|---|---|---|
| Boiling | 5–10 minutes | Pot + stove | Occasional use / travel | ✓ Excellent |
| Microwave Steam Bag | 2–4 minutes | Microwave + steam bag | Quick mid-day sterilizing | ✓ Excellent |
| Electric Steam Sterilizer | 10–15 minutes | Electric sterilizer | Exclusive pumpers / daily routine | ✓ Best Daily |
| Dishwasher (hot + heated dry) | 1–2 hours | Dishwasher-safe parts required | End-of-day batch cleaning | ✓ Good |
Can You Sterilize Breast Pump Parts in a Bottle Sterilizer?
Yes — you can absolutely sterilize breast pump parts in a bottle sterilizer, and it’s one of the most practical options available to nursing moms. Both electric steam sterilizers and microwave steam bag sterilizers are designed to handle breast pump components alongside baby bottles and nipples.
When using a steriliser for breast pump parts, here’s what to keep in mind:
- Always wash parts with hot soapy water first — a sterilizer is not a substitute for proper cleaning
- Check that your specific pump components are rated for steam sterilization in the manufacturer’s manual
- Parts with metal springs or complex electronic components (like wearable pump units) should never go in a sterilizer
- Follow the sterilizer manufacturer’s instructions exactly — overfilling or underfilling with water affects sterilization effectiveness
- Allow items to cool before removing, and air-dry completely before storage
- Items remain sterile for up to 24 hours inside a closed electric sterilizer
If you’re currently using or shopping for a wearable breast pump, sterilizing the silicone cups and hubs in a bottle sterilizer is typically safe — but always separate the electronic motor unit first. Never immerse or steam the motor.
How to Prevent Mold & Bacteria in Your Breast Pump
Even with regular cleaning, certain conditions can still encourage mold and bacterial growth. Here’s what I’ve learned through nursing practice and pump testing — the small habits that make the biggest difference in keeping your pump truly safe.
The Golden Rules for Preventing Mold
- Never reassemble or store parts that are still damp. Moisture trapped between parts is the number one cause of mold growth. When in doubt, give them another 30 minutes of air-drying time.
- Always use paper towels, not cloth towels. Cloth towels harbor bacteria and transfer them directly to clean parts. Paper towels are single-use and hygienic.
- Avoid leaving milk residue overnight. If you pump in the evening and don’t clean immediately, bacteria multiply rapidly overnight. Clean within 1–2 hours of each session.
- Keep a close eye on valves and membranes. These small silicone pieces are the most likely spots for milk residue to hide and bacteria to thrive. Replace them every 4–8 weeks or as soon as you see discoloration or tearing.
- Store reassembled pump parts in a sealed bag or container. Open storage exposes cleaned parts to airborne contaminants. A simple sealable bag works perfectly.
- Run pump tubing for a few minutes after pumping to dry out any condensation. Moisture in the tubing is the precursor to mold. Disconnect the tubing from the flange, keep it attached to the motor, and run the pump to blow dry the interior.
If you discover mold anywhere on your breast pump parts — especially inside the tubing — stop using those parts immediately. Discard moldy tubing and any silicone parts with visible mold. Do not attempt to bleach or boil mold away from tubing; it cannot be adequately cleaned. Contact your pump manufacturer for replacement parts, or check if your insurance covers replacements via our insurance coverage guide.
What to Do About Breast Pump Tubing
Breast pump tubing is one of the most misunderstood components when it comes to cleaning. Here’s the key fact: when functioning correctly, tubing does not come into contact with your milk at all. It creates the suction pathway, so as long as your pump is assembled correctly, there’s nothing inside the tubing that touches breast milk.
That said, condensation can form inside the tubing — especially after long or warm pumping sessions. This moisture, if left sitting, can eventually lead to mold growth. Here’s how to manage your tubing safely:
After each session, check for condensation
Look into the tubing. Small water droplets are normal and manageable. This doesn’t mean your pump has a problem.
Run the pump to dry tubing out
Disconnect the tubing from the breast flange/connector but keep it attached to the pump motor. Turn the pump on and run for 1–2 minutes. The airflow will dry out any condensation.
Never wash the inside of tubing
Washing the inside of tubing makes it nearly impossible to dry completely — and a wet interior is far worse than dry condensation. Only ever wipe the outside of tubing with a damp cloth if it becomes soiled.
If you see milk inside the tubing — discard it
Milk inside the tubing means the valve or membrane is likely failing or was incorrectly attached. Discard that tubing set immediately, replace the valve/membrane, and check your assembly before the next session.
If you see mold — discard and replace
Mold in tubing cannot be properly cleaned or sterilized. Replace it immediately. Keep a spare set of tubing on hand at all times — it’s inexpensive and critically important.
8 Common Breast Pump Cleaning Mistakes to Avoid
Over years of nursing and pump testing, I’ve observed the same mistakes come up again and again. These are the ones most worth being aware of:
- Washing parts directly in the kitchen sink. The drain harbors dangerous bacteria. Always use a dedicated clean basin.
- Soaking parts in soapy water for hours without scrubbing. This was the method used in the 2016 Cronobacter case. Soaking is not cleaning — you must physically scrub each piece.
- Storing parts while still damp. Moisture trapped between stored parts creates a perfect mold environment. Always air-dry completely first.
- Using scented dish soap. Fragrance chemicals can transfer to breast milk. Use mild, unscented soap designed for baby items.
- Relying on the “fridge hack.” Storing used, unwashed pump parts in the refrigerator between sessions might slow bacterial growth — but it does not stop it. No published research has shown it to be a safe alternative to washing after every use.
- Skipping sterilization for older babies. The CDC recommends sanitizing at least once daily regardless of baby’s age when still feeding expressed milk. The risk decreases as babies grow, but never disappears.
- Using the same cloth towel to dry pump parts repeatedly. Cloth towels hold moisture and bacteria. Always use fresh paper towels for drying.
- Forgetting to sterilize before first use. New pump parts are not sterile out of the box. Always sterilize flanges, valves, bottles, and silicone parts before the very first pumping session.
Related Guides on Breast Pumps Hub
If you found this guide helpful, these resources from our site can further support your pumping journey:
Frequently Asked Questions
📚 References & Trusted Sources
- 1 Centers for Disease Control and Prevention (CDC). About Breast Pump Hygiene. cdc.gov/hygiene — Primary federal guidance on breast pump cleaning protocols and sterilization.
- 2 CDC. How to Keep Your Breast Pump Kit Clean. [Fact Sheet, PDF]. cdc.gov — Official step-by-step cleaning protocol fact sheet for healthcare providers and families.
- 3 Bowen, A., et al. Cronobacter sakazakii Infection Associated with Feeding Extrinsically Contaminated Expressed Human Milk to a Premature Infant — Pennsylvania, 2016. MMWR Morbidity and Mortality Weekly Report. CDC. — Case report that prompted CDC’s formal breast pump guidelines.
- 4 La Leche League International. Cleaning and Sanitizing Pumping Accessories. llli.org — Internationally recognized breastfeeding support organization guidelines on sterilization methods including boiling and steam.
- 5 UT Southwestern Medical Center. How to Properly Clean Your Breast Pump. utswmed.org — Academic medical center guidance including post-2022 Cronobacter case discussion.
- 6 Texas Children’s Hospital. Guidelines for Nursing Mothers: How to Safely Pump and Store Breast Milk. texaschildrens.org — Pediatric hospital-based breastfeeding guidance on cleaning frequency and sterilization.
- 7 Institute for the Advancement of Breastfeeding and Lactation Education (IABLE). Cleaning Breast Pump Parts. lacted.org — Lactation consultant perspective on CDC guidelines and clinical application.
- 8 American Academy of Pediatrics (AAP). Breastfeeding and the Use of Human Milk. Pediatrics. — AAP policy statement on human milk expression and infant feeding safety.
- 9 World Health Organization (WHO). Guidelines on Optimal Feeding of Low Birth-Weight Infants in Low- and Middle-Income Countries. WHO Press. — International framework for hygienic handling of expressed breast milk for vulnerable infants.