Education

Can You Mix Breast Milk from Different Days, Mixing

Can You Mix Breast Milk from Different Days? Here’s What to Know

Absolutely! Mixing breast milk from different days is generally safe and a great way to maximize your pumping efforts. But remember, safe storage is key! Freshly pumped milk can be stored in the refrigerator for up to 4 days (check out our guide on how long breast milk lasts in the fridge for a deeper dive!), while frozen milk can last a whopping 12 months. When combining milk, always cool fresh milk before adding it to refrigerated or frozen batches. This ensures proper storage temperatures and keeps your precious liquid gold safe for your little one. But before we dive deeper, let’s address the burning question: Can you mix breast milk from different days?  Yes, you can! However, following proper storage guidelines is crucial. This article will guide you through a step-by-step process for safe mixing and answer all your frequently asked questions about combining breast milk. The Art of Combining Breast Milk: A Step-by-Step Guide Combining breast milk from different days can be a great way to maximize your pumping efforts and ensure your baby has enough to eat. Here’s a simple guide to follow: Step 1: Check the Storage Dates Before mixing, ensure all the milk you’re combining has been stored correctly. Freshly expressed milk can be stored at room temperature for up to 4 hours, in the refrigerator for up to 4 days, or in the freezer for up to 12 months. Never mix fresh milk with previously frozen milk. Step 2: Thaw Frozen Milk (if applicable) If you’re combining milk from different days and one batch is frozen, thaw it completely in the refrigerator or under running lukewarm water. Never thaw breast milk in the microwave or at room temperature. Step 3: Warm (Optional) While not essential, you can gently warm the milk in a warm water bath before combining it. Avoid overheating, as this can destroy some of the milk’s beneficial properties. Step 4: Combine and Swirl Pour the separate milk batches into a clean, sanitized bottle or container. Gently swirl the milk to ensure even distribution of temperature and fat content. Step 5: Label and Use Once combined, label the container with the new “use by” date. This date should reflect the earliest expiration date of the individual milk batches you combined. FAQs Q: Is it okay to mix breast milk from different days? A: Yes, it’s generally safe to combine breast milk from different days as long as you follow proper storage guidelines (see above). Q: Can you combine breast milk from the same day? A: Absolutely! Combining milk from multiple pumping sessions throughout the day is a great way to create a larger volume for your baby. Q: Can I pump into the same bottle all day? A: It’s not recommended to keep adding milk to the same bottle throughout the day. Instead, store each pumping session’s milk separately, then combine them later if desired. Q: Can you mix breast milk from different days in the UK? A: The guidelines for safe breast milk storage and mixing apply universally, including the UK. Always follow the recommendations from your healthcare provider or a lactation consultant. Q: Can you mix frozen milk from different days? Yes, you can mix frozen breast milk from different days! Just thaw one batch completely in the refrigerator or under running lukewarm water before combining it with another frozen or refrigerated batch. Q: why can’t you add warm breast milk to cold? According to CDC guidelines; Adding warm breast milk to cold milk can raise the temperature of the stored milk. This creates a breeding ground for bacterial growth, potentially harming your baby. It’s best to cool fresh milk before mixing it with refrigerated or frozen milk to maintain safe storage temperatures. Key Takeaways—Can You Mix Breast Milk from Different Days? Here are the key points to remember when combining breast milk: Storage matters: Only combine milk that has been stored following safe practices (see Step 1). Thaw frozen milk: Never mix frozen milk with fresh milk. Always thaw frozen milk completely before combining. Warm gently (optional): You can warm the milk before combining, but avoid overheating. Label clearly: Label the combined milk with a new “use by” date based on the earliest expiration of the individual batches.

Can You Mix Breast Milk from Different Days? Here’s What to Know Read More »

How Often To Sterilize Breast Pump Parts?

How Often to Sterilize Breast Pump Parts How Often to Sterilize Breast Pump Parts (And Why It Matters) Let’s be honest—pumping is already a bit of a chore. Between sleepless nights and endless to-dos, figuring out how often to sterilize your breast pump parts can feel like one more thing to stress over. But here’s the short and sweet answer: You should sterilize your breast pump parts once a day if your baby is under 3 months old, was born prematurely, or has a weakened immune system. For older, healthy babies, daily sterilization is optional—washing thoroughly after every use is typically enough. Why Sterilizing Breast Pump Parts Is So Important Even when breast milk is full of natural antibodies, your pump parts can still harbor bacteria if not cleaned and dried properly. This is especially true for newborns and medically fragile babies who are more vulnerable to infections. Sterilization helps eliminate lingering germs that regular soap and water might miss. Quick Science Behind It Breast milk is a living fluid. While it’s incredibly safe, it’s still a bodily fluid—and bacteria can grow in the nooks and crannies of flanges, valves, and bottles if they’re not cleaned and sterilized properly. Sterilization ensures a clean slate for every feed. How Often Should You Sterilize Breast Pump Parts? Daily sterilization: If your baby is under 3 months old, premature, or immunocompromised. Weekly sterilization: If your baby is full-term and healthy, and you’re washing parts thoroughly after each use. After first use: Always sterilize brand-new parts before the first pump session. For day-to-day cleaning, wash parts thoroughly after every single use. You don’t need to sterilize after every session unless your baby is at high risk. How to Sterilize Breast Pump Parts (The Easy Way) 1. Boiling Water Method Submerge parts in a pot of boiling water for 5–10 minutes. Let them air dry on a clean surface. 2. Steam Sterilizer Bags Microwave sterilizer bags are quick and effective. Just add water, pop it in the microwave, and done in 3–5 minutes. 3. Electric Steam Sterilizers If you pump multiple times a day, an electric sterilizer can save time and energy—perfect for working moms or exclusive pumpers. Cleaning vs. Sterilizing: What’s the Difference? Cleaning means using soap and hot water (or dishwasher) to remove milk residue and visible dirt. You should clean pump parts after every single session. Sterilizing is the extra step that uses heat or steam to kill bacteria. It’s not needed every single time unless your situation calls for it (like a newborn or NICU baby). What Pump Parts Need to Be Sterilized? Flanges (breast shields) Valves and membranes Bottles and bottle caps Connectors Backflow protectors Note: Tubing doesn’t usually need sterilizing unless milk or moisture gets inside. Check your pump manual for brand-specific instructions. When You Can Stop Sterilizing Daily Once your baby is over 3 months old and healthy, you can safely ease up on daily sterilization. Instead, wash thoroughly after each session and sterilize once a week—or more if you prefer added peace of mind. Pro Tips to Make Sterilizing Less of a Hassle Buy extra parts: So you’re not washing the same set 6 times a day. Use a drying rack: Let air dry completely before reassembling. Avoid towels—they can introduce new bacteria. Sanitize during naps: Or when you do dishes—make it a habit, not a headache. More Helpful Resources for Pumping Moms The Ultimate Guide To Breast Pumps How Soon Can I Breastfeed After Pumping? Will Pumping Every 2 Hours Increase Milk Supply? How To Increase Milk Supply When Pumping How To Store Breast Milk Final Thoughts Keeping your breast pump parts clean and sterile doesn’t have to feel overwhelming. As long as you follow the basic cleaning and sterilizing schedule, you’re doing an amazing job. Your baby’s health is protected, and your pumping journey can be just a little smoother with a clear routine. And remember—sterilizing is only one piece of the puzzle. For more tips, head over to Breast Pumps Hub to find helpful guides, product reviews, and honest mom-to-mom advice to support your journey. By Charlotte Rose Registered Nurse | Mom of 2 | Tested 50+ Pumps View All Articles

How Often To Sterilize Breast Pump Parts? Read More »

how to measure nipple for flange size

How To Measure Nipple For Flange Size: Find Your Perfect Pumping Fit!

Believe it or not, a big part of achieving optimal milk expression lies in something as simple as the right flange size. Using a flange that’s too small can cause pain and limit milk flow, while one that’s too big can be uncomfortable and lead to inefficiency. But how do you know which size is perfect for you? The answer lies in measuring your nipples! This flange size guide will show you exactly how to measure nipple for flange size, giving you the information you need to find your perfect fit. What is a Flange? A flange is the funnel-shaped part of your breast pump that fits over your breast during pumping sessions. It creates a seal around your nipple and areola (the darker pigmented area around your nipple) to stimulate milk production and expression. The flange size directly impacts how well your nipple fits inside the tunnel, affecting comfort, efficiency, and overall milk output. Step-by-Step Guide: Measuring Your Nipples for Flange Size Gather your tools: You’ll need a ruler or a soft, flexible measuring tape with millimeters (mm) markings. Find the sweet spot: Locate the base of your nipple, where it meets the darker colored area around it (the areola). Don’t include the areola in your measurement. Read more about the nipple size and the measurement area in the below picture.  Measure with precision: Gently hold the ruler or tape measure at the base of your nipple and record the diameter in millimeters. It’s best to measure both nipples as they can sometimes differ slightly in size. Account for expansion: Since your nipples will naturally expand during pumping, add 4 millimeters to your initial measurement. For example, if your nipple measures 18 mm, a comfortable flange size for you would likely be 22 mm. What size flange for a 13mm nipple? Following the 4mm rule, a comfortable flange size for a 13mm nipple would likely be around 17mm. However, this is just an estimate. It’s crucial to measure your own nipples for the most accurate fit. How to Measure Flange Size with Inverted Nipples Measuring inverted nipples can be a bit trickier. Here’s what you can do: Gently stimulate the nipple to encourage it to protrude slightly. If it doesn’t protrude enough for an accurate measurement, take a measurement of the widest part of the areola. Consult a lactation consultant for a personalized flange fitting, especially if you have very inverted nipples. Flange Size Chart The below table provides a general guideline to help you find the recommended flange size based on your nipple measurement. You can also calculate your flange size using our Flange Size Calculator. Remember, this is a starting point, and individual anatomy can vary. It’s always recommended to consult a lactation consultant for a personalized flange fitting, especially if you experience any discomfort while pumping. Here is a Flange size chart for your nipples; Nipple Size (mm) Recommended Flange Size (mm) 15 19 17 21 20 24 23 27 25 28 28 32 30 33 32 36 +4mm rule: Add 4 millimeters to your nipple measurement to account for expansion during pumping. Is there a formula for flange size? While the 4mm rule provides a good starting point, it’s not a perfect formula. Flange size can also depend on factors like nipple elasticity and breast tissue firmness. Consulting a lactation consultant can help you determine the ideal size based on your individual anatomy. Even with proper flange size, achieving optimal comfort and milk flow can depend on your breast pump’s technology. Consider exploring pumps known for their gentle suction and personalized settings, like the Spectra S1, the Elvie Pump for hands-free pumping, the innovative in-bra Willow Pump, or the trusted performance of Medela pumps. Remember, a lactation consultant can also offer valuable guidance on flange selection and pump choice for your specific needs. Key Takeaways—How To Measure Nipple For Flange Size? By following these simple steps and using the handy 4 mm rule, you can easily determine the ideal flange size for your breast pump. Remember, a well-fitting flange is crucial for a comfortable and productive pumping experience. If you’re still unsure about the perfect size or experience any discomfort while pumping, don’t hesitate to consult a lactation consultant for personalized guidance. Related: How To Store Breast Milk? How Often To Pump Milk? Drinks To Increase Milk Supply Power Pumping: A Definitive Guide 

How To Measure Nipple For Flange Size: Find Your Perfect Pumping Fit! Read More »

Breast Milk Storage: How Long Is It Good For?

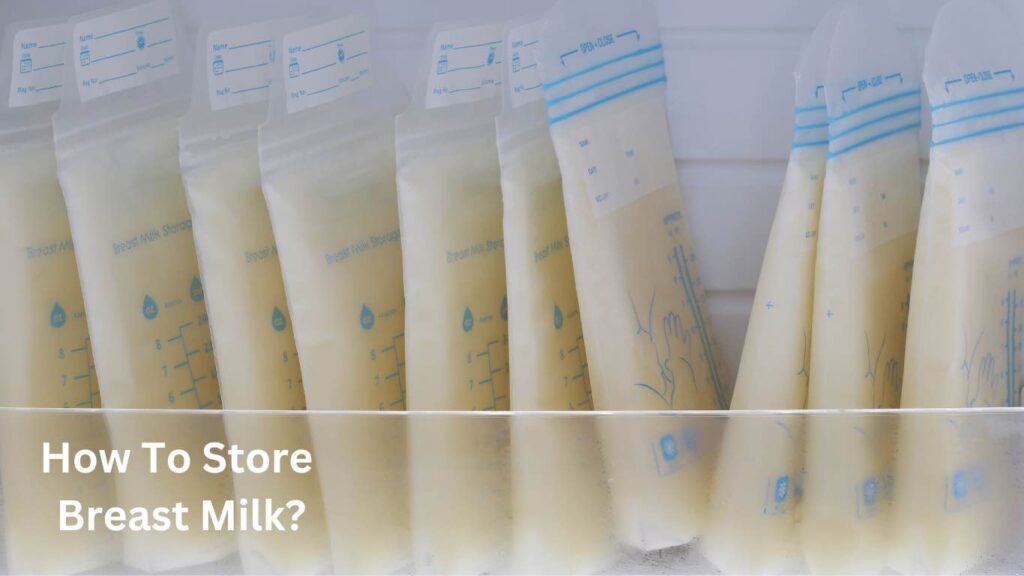
Breast milk is a liquid gold for your baby, packed with essential nutrients and antibodies that support their growth and development. But with the demands of a busy life, pumping and storing breast milk becomes a necessity for many moms. However, navigating storage guidelines can be confusing. This comprehensive guide will answer all your questions about how long is breast milk good in the fridge, covering storage times in the fridge, at room temperature, and in the freezer. Understanding Breast Milk Storage The key to safe breast milk storage lies in temperature control. Breast milk is a breeding ground for bacteria, and improper storage can accelerate its growth, making the milk unsafe for your baby. Here’s a breakdown of how temperature affects storage duration: Room Temperature (77°F or colder): Freshly pumped breast milk can be safely stored at room temperature (ideally in a cool, dark place) for up to 4 hours [1, 2]. This is a convenient option for short outings or missed feeding sessions. Refrigerator (39°F or 4°C): For longer storage, the refrigerator is your best bet. Properly stored breast milk can last in the back of the fridge (where the temperature is most stable) for up to 4 days. Studies have shown that breast milk retains most of its nutritional value and protective factors during this period. How long is frozen breast milk good for?: For long-term storage, the freezer is the champion. Breast milk can be safely stored in a deep freezer (-15°F or -20°C) for up to 12 months. However, breast milk quality can decline over time, with some vitamins and enzymes degrading slowly. Experts recommend using frozen breast milk within 6 months for optimal quality but according to some studies; breast milk stored in the fridge for up to 72 hours retains more protein and energy compared to milk frozen for longer than 2 weeks. Important Note: These are general guidelines. Individual factors like the cleanliness of the storage container and the maturity of your baby can influence storage times. Always err on the side of caution and discard milk if you’re unsure about its quality. Frequently Asked Questions (FAQs) Here are some commonly asked questions about breast milk storage, addressed in detail: Question: How Long Is Breast Milk Good For After Pumping? Freshly expressed or pumped breast milk can be stored at room temperature for up to 4 hours or in the refrigerator (cold temperature) for up to 4 days. And if it is frozen it can be used for up to 12 months. Question: How Long Does Breast Milk Last in the Fridge? Properly stored breast milk can last in the back of the refrigerator for up to 4 days. It is stable for up to one year if frozen but the quality of the milk and nutrients are not as high as it is in the fresh breast milk. Question: How Long Does Breast Milk Last at Room Temperature? As per CDC guidelines, Freshly pumped breast milk can be safely stored at room temperature (ideally in a cool, dark place) for up to 4 hours. Question: How Long Is Frozen Breast Milk Good For? Breast milk can be safely stored in a deep freezer (-15°F or -20°C) for up to 12 months, with optimal quality for up to 6 months. Question: How Long Can Warmed Breast Milk Stay Out? Once warmed to room temperature, breast milk should be consumed within 2 hours. Discard any leftover warmed milk after this timeframe. Question: How Long Is Breast Milk Good For After Thawing? Thawed breast milk can be stored in the refrigerator for up to 24 hours. Remember: Never refreeze thawed breast milk. Safe Storage Tips for Optimal Breast Milk Quality Here are some additional tips to ensure safe and high-quality breast milk storage: Use clean containers: Always store breast milk in clean, food-grade containers with tight-fitting lids. Bottles made specifically for breast milk storage are ideal. Label your milk: Clearly label each container with the date and time of expression. Freeze quickly: For long-term storage, transfer breast milk to the freezer within 24 hours of pumping. Thaw gently: Thaw frozen breast milk in the refrigerator overnight or under running lukewarm water. Never thaw breast milk in the microwave. Conclusion: Breast Milk Storage By understanding how temperature affects breast milk storage, you can ensure your baby receives the best possible nourishment. Following the guidelines in this comprehensive guide will empower you to safely store and use breast milk, allowing you to continue providing your baby with this precious gift. Related: How Often To Pump Milk? Drinks To Increase Milk Supply Power Pumping: A Definitive Guide 

Breast Milk Storage: How Long Is It Good For? Read More »

how often to pump breast milk, How often should you pump

How Often To Pump Breast Milk: Breastfeeding Frequency Guide

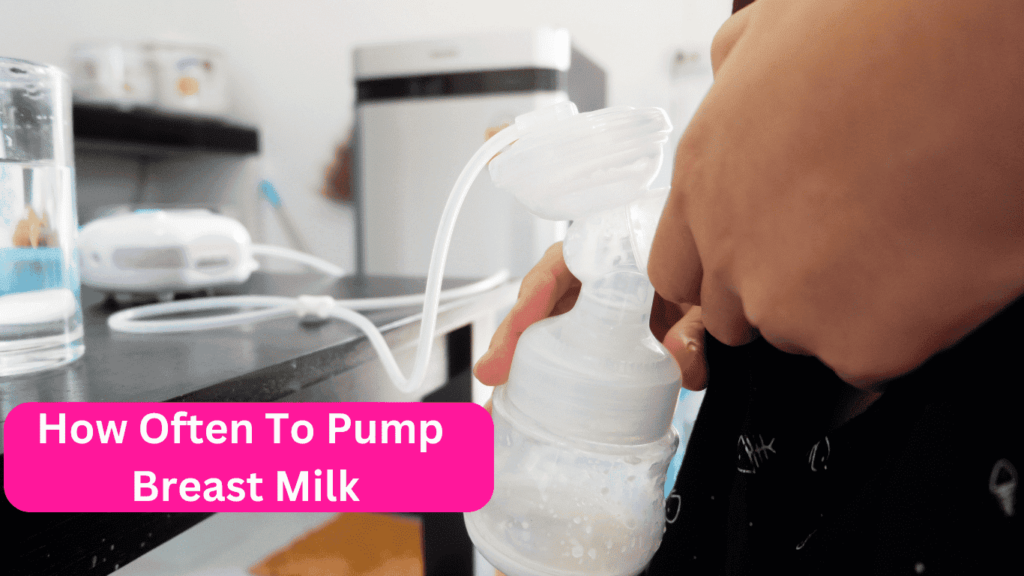
Breastfeeding is a beautiful way to nourish your baby, providing essential nutrients and strengthening your bond. But for some moms, pumping becomes integral to their breastfeeding experience. Whether you’re returning to work soon, building a milk stash, or supplementing feedings, understanding how often to pump breast milk is key. However, there’s no one-size-fits-all answer – it depends on your unique situation, needs and goals. Understanding Your Milk Supply and Demand Just like any other supply chain, breast milk production operates on a simple principle: supply and demand. The more your baby nurses, or the more milk you remove through pumping, the more milk your body produces. This is regulated by hormones, with prolactin playing a starring role. Prolactin increases in response to nipple stimulation, signaling your body to create more milk. A newborn’s stomach capacity also increases rapidly in the first month. On day 1, it’s about 5-7 mL, increasing to 80-150 mL by day 30. This increase in demand is signalling the body to produce more milk. Staying hydrated is also crucial for more milk production. Aim for eight glasses of water daily, and consider incorporating herbal teas or drinks formulated to support lactation. To explore these options further, check out our “What to Drink to Increase Milk Supply” article! Frequency Fundamentals: Tailoring Your Pumping Schedule So, how often should you pump? Here are some key factors to consider: Your Baby’s Needs: This is the most important factor. Newborns typically nurse every 2-3 hours, so aiming for 8-12 pumping sessions in 24 hours can help maintain your supply. At 4 to 5 weeks old, babies reach their peak daily milk intake of about 900 mL (30 oz.). You may expect your baby to drink about 90 to 120 mL (3 to 4 oz.) per feeding session. You can adjust your pumping schedule accordingly as your baby grows and their nursing sessions become spaced out. For more in-depth information about pumping times, read our article “Pumping Schedule to Increase Milk Supply.” Your Pumping Goals: Are you building a stash, supplementing feedings, or exclusively pumping? Exclusive pumpers may need to pump more frequently, every 3 hours around the clock, to mimic a baby’s feeding pattern and stimulate milk production. Supplementing moms can aim for a schedule that mirrors their baby’s nursing sessions. At the same time, those building a stash can incorporate pumping sessions in between nursing or after morning feedings when breasts are typically fuller. For occasional milk supply boosts, you can explore power pumping, a technique that mimics cluster feeding – check out our article on “Power Pumping: The Ultimate Guide” for a deeper dive into timing considerations! Your Comfort Level: Pumping shouldn’t be painful. Aim for sessions that last 15-20 minutes per breast or until your milk flow slows down. If you’re not emptying your breasts fully, consult a lactation consultant for tips. Lactation consultants and pediatricians recommend maintaining a consistent pumping schedule. “Regular breast emptying is key to maintaining milk supply,” they advise. “Aim to pump as often as your baby would normally feed, which is typically every 2-3 hours for newborns.” Finding Your Groove: Flexibility is Key Remember, every breastfeeding journey is unique. Your pumping schedule might need adjustments along the way. Here are some tips to find your rhythm: Listen to Your Body: Pay attention to hunger cues and fullness in your breasts. Feeling engorged before a scheduled pump? Move your session up. Track Your Progress: Track your pumping sessions and milk output. This can help you identify patterns and adjust your schedule as needed. Choose the Right Equipment: Having a reliable, efficient breast pump can make a significant difference in your pumping experience. For an in-depth look at different types of breast pumps and how to choose the best one for your needs, check out our ultimate guide to Breast Pumps. Cluster Feeding: Be prepared for periods of cluster feeding or power pumping, especially in the first few months. During these times, your baby may feed more frequently and irregularly, which helps stimulate milk production. Seek Support: Don’t hesitate to contact a lactation consultant for personalized guidance. They can help you troubleshoot pumping challenges and establish a schedule that works for you and your baby. The Takeaway: How Often To Pump Breast Milk? Finding the perfect pumping frequency takes time and practice. Be patient with yourself, prioritize your comfort, and, most importantly, celebrate your commitment to nourishing your baby. Remember, a successful pumping journey is about consistency and responding to your unique needs. Consult a lactation expert if you notice a steady decline or decrease in your milk supply, have concerns about your baby’s feeding behavior, or experience pain after pumping sessions.

How Often To Pump Breast Milk: Breastfeeding Frequency Guide Read More »

When Is It Too Early To Pump Breast Milk

When Is It Too Early To Pump Breast Milk: Too Soon Or Too Late?

Breastfeeding is a beautiful and natural way to nourish your newborn. It provides essential nutrients for your baby’s growth and development while also fostering a close bond between you. However, navigating the early days of breastfeeding can be a learning curve, and one of the questions that pops up frequently is: When is it too early to pump breast milk? Understanding Milk Supply and Demand Your milk supply works on a simple principle: supply and demand. The more your baby nurses, the more milk your body produces. This is regulated by hormones, with prolactin being the key player. Prolactin increases in response to your baby’s suckling, signaling your body to produce more milk. Why Waiting Might Be Wise So, when it comes to pumping, waiting a few weeks before introducing it can be beneficial for several reasons: Focus on Latch and Feeding: The first few weeks are crucial for establishing a good latch. This ensures your baby transfers milk efficiently and gets the nourishment they need. Introducing pumping too early can disrupt this process and lead to nipple confusion. Building Confidence: Learning to breastfeed takes practice for you and your baby. Frequent nursing sessions help you gain confidence in your ability to breastfeed effectively. Protecting Your Supply: Pumping too frequently in the early days, when your supply is still regulating, might send mixed signals to your body. This could potentially lead to a lower milk supply than what your baby naturally demands. While some studies suggest pumping early can be beneficial for maintaining milk supply, particularly for mothers of premature or separated babies [1], others highlight the importance of establishing effective breastfeeding first [2]. Exceptions: When Pumping Might Be Necessary Early On There are situations where pumping might be recommended even before breastfeeding is fully established: Premature or Ill Babies: If your baby is premature or has health concerns that prevent them from directly breastfeeding, pumping can help stimulate your milk production and provide precious colostrum, the first milk rich in antibodies and nutrients. Separation from Baby: If you need to be separated from your baby for short periods, pumping can help maintain your milk supply and provide a source of breast milk for bottle feeding. The Golden Window: When to Introduce Pumping Generally, waiting 3-4 weeks after birth is a good rule of thumb for most moms to start pumping. By this time, your breastfeeding routine should be well-established, your baby effectively transfers milk, and your milk supply should be regulated. Here are some additional factors to consider: Are you planning to return to work soon? If so, starting to pump a few weeks before your return can help build a stash of breast milk and allow your baby to get accustomed to bottle feeding. Do you want to share feeding duties with your partner? Pumping allows your partner to participate in feeding your baby, fostering a sense of shared responsibility. Remember, every breastfeeding journey is unique. If you have any concerns about the time of the pumping or your milk supply, don’t hesitate to reach out to a lactation consultant for personalized guidance. They can help you create a pumping schedule that works for you and your baby while ensuring a smooth and successful breastfeeding experience. Related: 10 Best Breast Pumps 5 Wearable Breast Pumps

When Is It Too Early To Pump Breast Milk: Too Soon Or Too Late? Read More »

Where Can I Sell My Breast Pump

Where Can I Sell My Breast Pump? A Comprehensive Guide

Breast pumps, whether brand new or gently used, are lifesavers for many moms. However, circumstances may arise where you find yourself with a breast pump you no longer need. This guide explores various avenues, both offline and online, to sell your breast pump with ease. Selling New Breast Pumps If you have a brand new breast pump, there are numerous avenues to explore for selling it. Pharmacies and Marts: Many pharmacies and retail stores may be interested in stocking breast pumps. Approach them with a proposal to sell your pumps on a consignment or wholesale basis. Online Platforms: Utilize social media platforms like Facebook Ads to reach a broad audience. Craft compelling ad copies highlighting the benefits of your breast pump and target relevant demographics. Facebook Marketplace: Create listings on Facebook Marketplace to connect with potential buyers in your local area directly. This platform is frequented by parents seeking discounted baby items, making it an ideal place to sell new breast pumps. Other Social Networks: Extend your reach by exploring other social networks such as Instagram and Twitter. Utilize hashtags and engaging content to attract potential buyers. Pro Tip: Highlight the pump’s brand warranty and any unopened accessories to add value to your offer. Selling Used Breast Pumps While the market for used breast pumps may be more limited, there are still viable options available. Facebook Marketplace: As mentioned earlier, Facebook Marketplace remains a popular choice for buying and selling used items. Price your used breast pump competitively to attract buyers quickly. OfferUp: List the breast pump you use on OfferUp, a platform dedicated to buying and selling second-hand goods. Provide clear photos and detailed descriptions to enhance your listing’s visibility. Mercari: Consider selling your used breast pump on Mercari, another online marketplace known for its user-friendly interface and active buyer community. Nextdoor: Tap into your local community by listing your breast pump on Nextdoor. This platform allows you to connect with neighbors who may be in need of baby items. Pro Tip: Be upfront about the condition of your pump and any minor wear and tear. Transparency builds trust and helps you find the right buyer. Safety First: A Note on Pump Types It’s essential to understand the type of breast pump you’re selling. Closed-system pumps are generally considered safe for resale as their design allows for thorough cleaning. Open-system pumps may have parts that are difficult to sterilize, so donating them to a lactation consultant or organization specializing in cleaning them for resale might be a better option. Tips for Selling Success Regardless of whether your breast pump is new or used, here are some tips to maximize your selling potential: Quality Imagery: Provide clear, high-quality images of the breast pump from various angles to give potential buyers a better understanding of its condition. Detailed Descriptions: Be transparent about the pump’s usage, any included accessories, and its overall condition in your product descriptions. Competitive Pricing: Research similar listings to ensure your pricing is competitive. Consider offering discounts or bundles to attract buyers. Prompt Communication: Respond to inquiries and messages from potential buyers promptly to maintain their interest and trust. Conclusion—Where Can I Sell My Breast Pump? Selling your breast pump, whether new or used, can be straightforward with the right approach. By effectively leveraging both offline and online platforms, you can connect with interested buyers and ensure a seamless selling experience. Remember to prioritize transparency, communication, and professionalism throughout the selling process to maximize your success. If selling isn’t your priority, consider donating your pump to a worthy cause. Some organizations accept breast pumps in good condition to help mothers in need. This allows you to pay it forward and support another breastfeeding journey.

Where Can I Sell My Breast Pump? A Comprehensive Guide Read More »

What To Drink To Increase Breast Milk?

Boost Your Supply: What To Drink To Increase Breast Milk?

Breastfeeding is a beautiful journey of love, nourishment, and creating an unbreakable bond with your baby. It’s normal to have questions as you go along, and the availability of milk is among the most common concerns. This guide looks at hydrating beverages that might help you reduce thirst but also possibly increasing milk production. 2. Water: Your Body’s Best Friend  Water is the foundation of good health, and breastfeeding is no exception. Breast milk is about 87% water, so staying hydrated is crucial. Aim for around 13 cups (3 liters) of fluids daily. Here are some tips to make water more enjoyable: Fruity Infusions: You can add slices of lemon, cucumber, or berries for a refreshing twist. Bubbly Refreshment: Opt for unsweetened sparkling water with a splash of natural fruit juice. Your Hydration Partner: Invest in a reusable water bottle and carry it with you as a reminder to sip throughout the day. 2. Herbal Powerhouses: Galactagogue Teas Certain herbs have galactagogue properties, meaning they may help stimulate milk production. However, it’s important to be cautious: Fenugreek: A well-known herb with research suggesting it can increase milk supply, especially in the early days. Blessed Thistle: Traditionally used to support lactation, although more research is needed. Fennel Seed: is another galactogogue and may help with milk flow and ease digestion. Nettle Leaf: Rich in vitamins and minerals, some studies suggest it might support milk production.  Important Note: Always consult your doctor before consuming herbal teas, especially if you have any underlying health conditions or are taking medications. 3. Coconut Water: Nature’s Electrolyte Replenisher  While not directly linked to milk production, coconut water is a natural source of electrolytes, which are important for staying hydrated, especially during hot weather or intense exercise. 4. Milk it for the Nutrients Dairy and fortified plant-based milk alternatives can be a good source of calcium and vitamin D, beneficial for breastfeeding mothers. However, limit cow’s milk intake if your baby shows signs of dairy sensitivity. 5. Smoothie Power-Ups  Smoothies are a delicious way to get a variety of fruits, vegetables, and even lactation-supporting herbs like fenugreek or brewer’s yeast, all while staying hydrated. Key Points to Remember Hydration is Key: While some drinks may support milk production, water remains your primary source of hydration. Sip Often: Don’t wait until you’re thirsty to drink fluids. Aim for consistent sipping throughout the day. Listen to Your Body: Increased thirst is a sign you need more fluids. Seek Expert Advice: If you have concerns about your milk supply, consult a lactation consultant or pediatrician. Conclusion—What To Drink To Increase Breast Milk? By staying hydrated and incorporating these nourishing beverages into your routine, you can support your milk production while keeping yourself feeling your best throughout your breastfeeding journey. Remember, a happy and healthy mom means a happy and healthy baby! Read Next; Top 5 Best Wearable Breast Pumps Top 10 Best Breast Pump 

Boost Your Supply: What To Drink To Increase Breast Milk? Read More »

Power Pumping Schedule, pros and cons and more

Power Pumping: Schedule, Pros & Cons [The Ultimate Guide]

Power Pumping Guide Power Pumping: Schedule, Pros & Cons [The Ultimate Guide] Charlotte Rose A Professional Nurse, A Mom of Two & Have Tested 40+ Breast Pumps As a breastfeeding mom, you’ve likely heard about the incredible benefits of breast milk. From protecting against infections to potentially lowering the risk of childhood obesity, it’s often hailed as nature’s perfect food. But what happens when your body’s milk production doesn’t quite meet your baby’s demands? Enter power pumping – a game-changing technique that could revolutionize your breastfeeding experience. What Is Power Pumping? Power pumping (you can also call it cluster pumping), is a game changing technique that mimics a natural phenomenon called cluster feeding. During cluster feeding, babies nurse more frequently in shorter bursts, signaling to the mother’s body that more milk is needed. Power pumping recreates this pattern using a breast pump instead of baby’s sucking, tricking your body into boosting up milk production. How Does It Work? Breast milk production operates on a supply and demand basis. When breasts are emptied more frequently, the body responds by producing more milk. Power pumping takes advantage of this biological process by creating frequent, short bursts of demand, stimulating milk-producing hormones and emptying the breasts more thoroughly. How to Power Pump? While there’s no one-size-fits-all approach for power pumping schedule to increase milk supply but the core principle is to stimulate your body by increasing pumping frequency within a specific timeframe each day, encouraging it to boost milk production in response to the heightened demand. To see noticeable results, you may need to dedicate around an hour daily for a week or more. Some moms even commit up to two hours a day when power pumping. Remember to include short breaks throughout your sessions to help prevent discomfort or soreness in your nipples and breasts. Here’s a typical cluster feeding schedule: Power Pumping Schedule Pump for 20 Minutes: This initial session mimics a baby’s hungry feeding burst, draining the readily available milk in the breast. Rest for 10 Minutes: Give your body a chance to restock on milk supplies. Repeat Steps 1 & 2 Twice More: These additional/extra sessions further stimulate milk production. Final Pump for 10 Minutes: This last session maximizes the signal to your body by guaranteeing thorough emptying. This hour-long session can be done once or twice a day in addition to your regular nursing or pumping routine. Some moms prefer an alternative schedule of 5 minutes pumping followed by 5 minutes rest, repeated 5-6 times. When to Consider Power Pumping Power pumping can be particularly helpful in situations such as: Experiencing a sudden drop in milk supply Returning to work and needing to build a milk stash When your baby starts solids and nurses less frequently During temporary dips due to illness or medication If you’re exclusively pumping and need to increase supply Remember, power pumping isn’t necessary if your milk supply is already meeting your baby’s needs. Oversupply can lead to its own set of challenges. What to Expect: The Power Pumping Journey Every mother’s body responds differently to power pumping. Some may see results in as little as a few days, while others might need to continue for a week or more. Most moms notice an increase in supply within 3-7 days of consistent power pumping. Patience and persistence are key – give your body time to respond to this new demand. How Effective is Power Pumping? For mothers who want to produce more milk, power pumping can be a huge help. Research indicates that it can be relatively successful; some mothers report a noticeable rise in production in as little as one week. Remember that consistency is essential! Following the cluster pumping program for a few days is better than doing long, irregular pumping sessions. Is Power Pumping the Right Choice for You? Before you begin power pumping, it’s essential to explore why your milk supply may be decreasing. In many cases, the issue isn’t your body—it could be your equipment. Breast pumps can lose effectiveness over time, especially after regular use. If your pump is over a year old or doesn’t seem to be performing well, it might be time to replace worn parts or even the entire unit. A visit to a lactation store or service center can help determine whether the pump is functioning properly. I also encourage you to schedule a session with a lactation consultant before making changes to your routine. Sometimes, low milk output is simply due to positioning, latch issues, or an inefficient pumping technique. With just a few adjustments, you might see an improvement in both comfort and supply. Also, try not to rely solely on behaviors like frequent feeding or fussiness as signs of low milk supply. What matters most is weight gain and consistent wet and dirty diapers. If those are on track, your baby is likely getting enough. If you have any doubts or concerns, please reach out. A personalized assessment can provide reassurance and the right support for your journey. Side Effects and Considerations Though generally safe, there are a few things to be aware of. Overly vigorous suction can harm breast tissue, causing engorged breast and reduce milk production. Additionally, power pumping can lead to oversupply, which might be uncomfortable for your baby and increase the risk of mastitis (breast infection). Listen to your body – if you experience pain or discomfort, adjust the suction strength or shorten the pumping duration. Navigating Challenges in Your Power Pumping Journey While power pumping can be a game-changer for many moms, it’s not without its challenges. Understanding these potential hurdles and knowing how to overcome them can make your power pumping journey smoother and more successful. Time Commitment Power pumping requires dedicating an hour or more each day. Try to find a time that works best for your schedule, perhaps during your baby’s longest nap or in the evening while relaxing. Comfort Considerations If you experience discomfort, check your pump’s flange size and suction

Power Pumping: Schedule, Pros & Cons [The Ultimate Guide] Read More »

pumping schedule to increase milk supply

A How-To Guide On Pumping Schedule To Increase Milk Supply

Breastfeeding is a beautiful and natural way to nourish your baby, but it can sometimes come with challenges. One common concern for many nursing mothers is maintaining an adequate milk supply. Whether you’re exclusively pumping, supplementing breastfeeding with pumping, or just looking to boost your supply, having an effective pumping schedule to increase milk supply can make all the difference. This guide will walk you through everything you need to know about creating and maintaining a pumping schedule to increase your milk supply. We’ll cover the basics of milk production, how to craft an effective pumping routine, and provide tips and techniques to maximize your efforts. Understanding Milk Supply: The Basics How Milk Production Works Before diving into pumping schedules, it’s crucial to understand how milk production works. Your body operates on a supply and demand basis when it comes to breast milk. The more milk that’s removed from your breasts (either through nursing or pumping), the more your body is signaled to produce. Signs of Low Milk Supply It’s important to note that many mothers worry about their milk supply unnecessarily. Before attempting to increase your supply, look for these signs of genuinely low milk supply: Your baby isn’t gaining weight appropriately Your baby produces fewer wet and dirty diapers than expected Your baby seems unsatisfied after most feedings If you’re concerned, always consult with a pediatrician or an International Board Certified Lactation Consultant (IBCLC) to evaluate your specific situation. Crafting Your Pumping Schedule Establishing a Baseline For new mothers or those just starting to pump, it’s essential to establish a baseline pumping schedule. Here are some guidelines: Aim for 8-12 pumping sessions per day in the first few weeks postpartum. This simulates the frequent feeding habits of a newborn. Space sessions about 2-3 hours apart during the day. Include at least one pumping session during the night, as prolactin levels (the hormone responsible for milk production) are higher at night. Pumping Schedule for Newborns Here’s a sample schedule for mothers of newborns: 6:00 AM – Pump 8:30 AM – Pump 11:00 AM – Pump 1:30 PM – Pump 4:00 PM – Pump 6:30 PM – Pump 9:00 PM – Pump 11:30 PM – Pump 3:00 AM – Pump Remember, this is just an example. Your schedule should be tailored to your baby’s feeding patterns and your personal routine. Adjusting Your Schedule as Your Baby Grows As your baby gets older, their feeding patterns will change. They’ll likely take in more milk per feeding and go longer between feedings. Adjust your pumping schedule accordingly: 3-6 months: Aim for 6-8 pumping sessions per day 6-12 months: 4-6 pumping sessions may be sufficient Advanced Techniques to Boost Supply Power Pumping: Mimicking Cluster Feeding Power pumping is a technique designed to mimic cluster feeding, which naturally boosts milk production. Here’s how to do it: Choose a time of day, preferably when your supply is naturally higher (often in the morning). Pump for 20 minutes. Rest for 10 minutes. Pump for 10 minutes. Rest for 10 minutes. Pump for 10 minutes. Repeat this process for 3-7 days, then return to your regular pumping schedule. You should notice an increase in supply within a week. Double Pumping for Efficiency Using a double electric pump to express milk from both breasts simultaneously can save time and may increase milk output. Studies have shown that double pumping can yield 18% more milk compared to single pumping each breast sequentially. Troubleshooting Common Pumping Problems Dealing with Low Output If you’re experiencing low output during pumping sessions: Ensure your flanges fit correctly. Try breast compression while pumping. Use a warm compress before pumping to encourage letdown. Practice relaxation techniques to reduce stress. Addressing Sore or Cracked Nipples To prevent and treat sore nipples: Apply lanolin or other nipple creams after pumping. Ensure proper flange fit to avoid friction. Start pumping at a lower suction and gradually increase. Allow your nipples to air dry after pumping. Storing and Handling Expressed Milk Proper storage is crucial for maintaining the quality of your expressed milk: Room temperature: Up to 4 hours Refrigerator: Up to 4 days Freezer: Up to 6 months (12 months in a deep freezer) Always label milk with the date it was expressed and use the oldest milk first. You can read our in depth guide on how to store breast milk. Alternative Methods to Boost Supply While pumping is highly effective, you can also try these additional methods: Stay hydrated by drinking plenty of water. Eat a balanced diet rich in protein, healthy fats, and complex carbohydrates. Consider galactagogues (foods or herbs that may increase milk production) like oatmeal, fenugreek, or blessed thistle. Get adequate rest and manage stress levels. Pumping While Working or Traveling Maintaining your pumping schedule while working or traveling can be challenging. Here are some tips: Communicate with your employer about your pumping needs. Invest in a good quality portable pump. Use a hands-free pumping bra to multitask if necessary. Bring a cooler bag for storing expressed milk. Consider a battery pack for your pump if outlets aren’t readily available. Frequently Asked Questions (FAQs) Will pumping every 2 hours increase milk supply? Pumping every 2 hours can be a good starting point, especially in the first few weeks postpartum, to mimic a newborn’s frequent feeding and stimulate milk production. However, it’s not necessarily a magic number. Listen to your body’s cues and adjust as needed. Aim for 8-12 pumping sessions every 24 hours, spaced out throughout the day and night. How often should I pump to increase milk supply? Frequency is key! Generally, pumping more often will signal your body to produce more milk. But again, individual needs vary. If you’ve established a baseline routine and want to boost supply, consider power pumping (explained later in the article). Always consult a lactation consultant for personalized guidance. What is the best schedule to increase milk supply? There’s no one-size-fits-all “best” schedule. However, most experts recommend starting with frequent pumping sessions (every 2-3 hours)

A How-To Guide On Pumping Schedule To Increase Milk Supply Read More »